Member-only story
I Made an Alexa Knockoff That Doesn’t Spy on Me
DIY Raspberry Pi smart screen

Smart assistants come with a lot of baggage.
I like the idea of having a smart screen on my desk. It’s a decidedly sci-fi concept: A little dashboard that’s specifically coded to display up-to-date information from all different sources that I want to see, without distractions or extraneous features.
But I don’t want a device with a microphone or a camera on it. I don’t want Amazon or Google to set what’s on my device, and I don’t trust them with an audio feed in my home.
So, I built my own.
The project took about 45 minutes, and it was shocking in its simplicity. The result is a smart screen that displays the time, my calendar, and a detailed local weather forecast, with room to add more information as I want. It’s also a local server to share some of my noncritical files between computers, after my commercially built NAS was hacked.
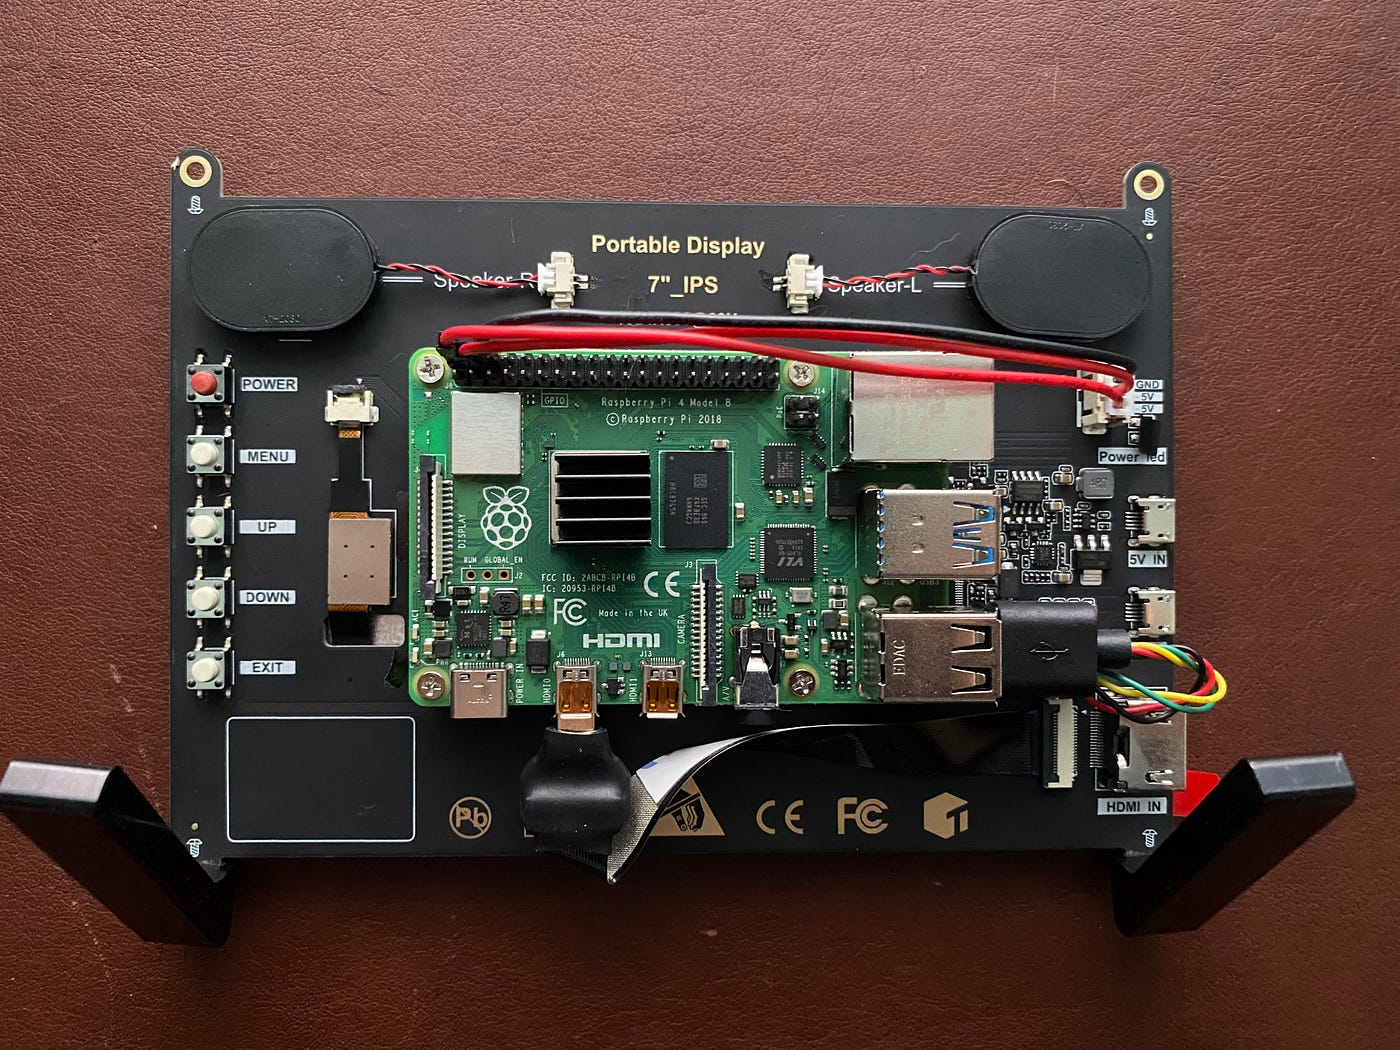
The entire project was seeded by a video I saw on YouTube from a channel called ETA Prime. The channel features single-board computers like the Raspberry Pi, and the accompanying accessories that third-parties build to make the tiny computers more useful. ETA Prime suggested this seven-inch touchscreen display, which I bought and has worked flawlessly so far. Paired with a Raspberry Pi 4 with 4GB of RAM, I have more than enough computing power to stream a movie in 1080p upstairs to my Apple TV through Plex, or use it as an intermediary cloud between my Mac and Windows devices.
The entire cost was $187.78, which included the seven-inch touchscreen, the Raspberry Pi, a 256GB SD card, and a power adapter with an on/off switch.
Once all the components arrived, assembling the hardware was relatively straightforward. I recommend watching the ETA Prime video, which shows the three connections the Raspberry Pi needs to connect to the display. (HDMI for video, USB for touchscreen support, and to the Pi’s top-left header pins for power.)